Prep photos perfectly for your custom Apple Watch face

With watchOS 2, you can now use any photo in your library to make a custom Apple Watch face. And that gives you a lot of freedom to make the wearable your own, but sometimes, you and the watch might have different ideas for how to treat your pictures.
Here’s a quick and easy way to make sure that your Apple Watch looks exactly how you want it to.
You probably already know how to sync your albums and get your pictures on your Apple Watch. If you don’t, check out our handy guide here. Or you can just keep reading; we’ll cover the basics below.
First, you want to make sure that your photos sync to your Apple Watch. You do this by going to the Watch app on your iPhone and then scrolling down to Photos. Under “Photo Syncing,” you can choose any album you want, or just pick “Recently Added” to access the last 100 pictures you took.
Once that’s taken care of, you can head over to the Photos app on your Apple Watch to browse through the synced pics and figure out which one you want to use. When you find the perfect shot, use Force Touch and click on the “Create Watch Face” prompt that pops up to instantly set the one you’re looking as your custom Apple Watch face.
 But that doesn’t always work as well as it could. The picture to the right was a portrait-oriented shot of my best dog friend, and that’s how the Apple Watch converted it into a face. It looks alright, but maybe I don’t want all of that garbage on my coffee table in the shot, and why would you want to cover up that little face or those amazing ears with a clock?
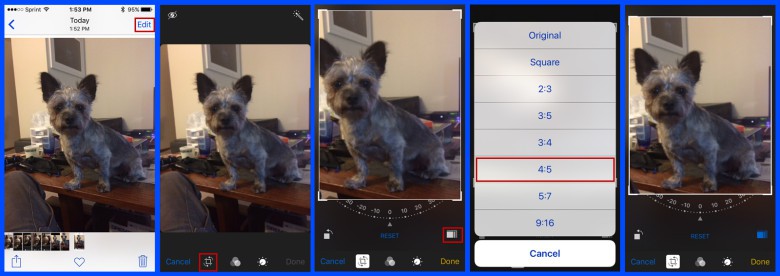
I think we can do better with this, so I went to the picture in my Photos app on the iPhone and took a screencap by pressing the home and power buttons together. That way, I can modify this copy without changing the original. Because we are about to crop the hell out of this thing.
Note that I’m doing this using an iPhone 5s, but you’ll have the same options on both an iPhone 6 and 6 Plus (or the s models, if you’re standing in a line right now).

Photo: Evan Killham/Cult of Mac
Once you have your desired photo open, tap on Edit in the upper right corner, and then click the Crop tool when the menu opens. After that, tap the squares above “Done” to pull up the menu of preset aspect ratios. Because the original picture is a Portrait, all you have to do is pick the 4:5 option. That is the exact aspect ratio of an Apple Watch. It’s like they planned this or something.
 Once you have it looking good, you can zoom and pan your photo to get it exactly where you want it — keeping in mind that you’re going to have a date and time in the upper right hand corner. Once you’re done, be sure to save your changes and then pull up that same picture in Photos on your Apple Watch. If you’re using the “Recently Taken” option for syncing, your new version will be the last one in there.
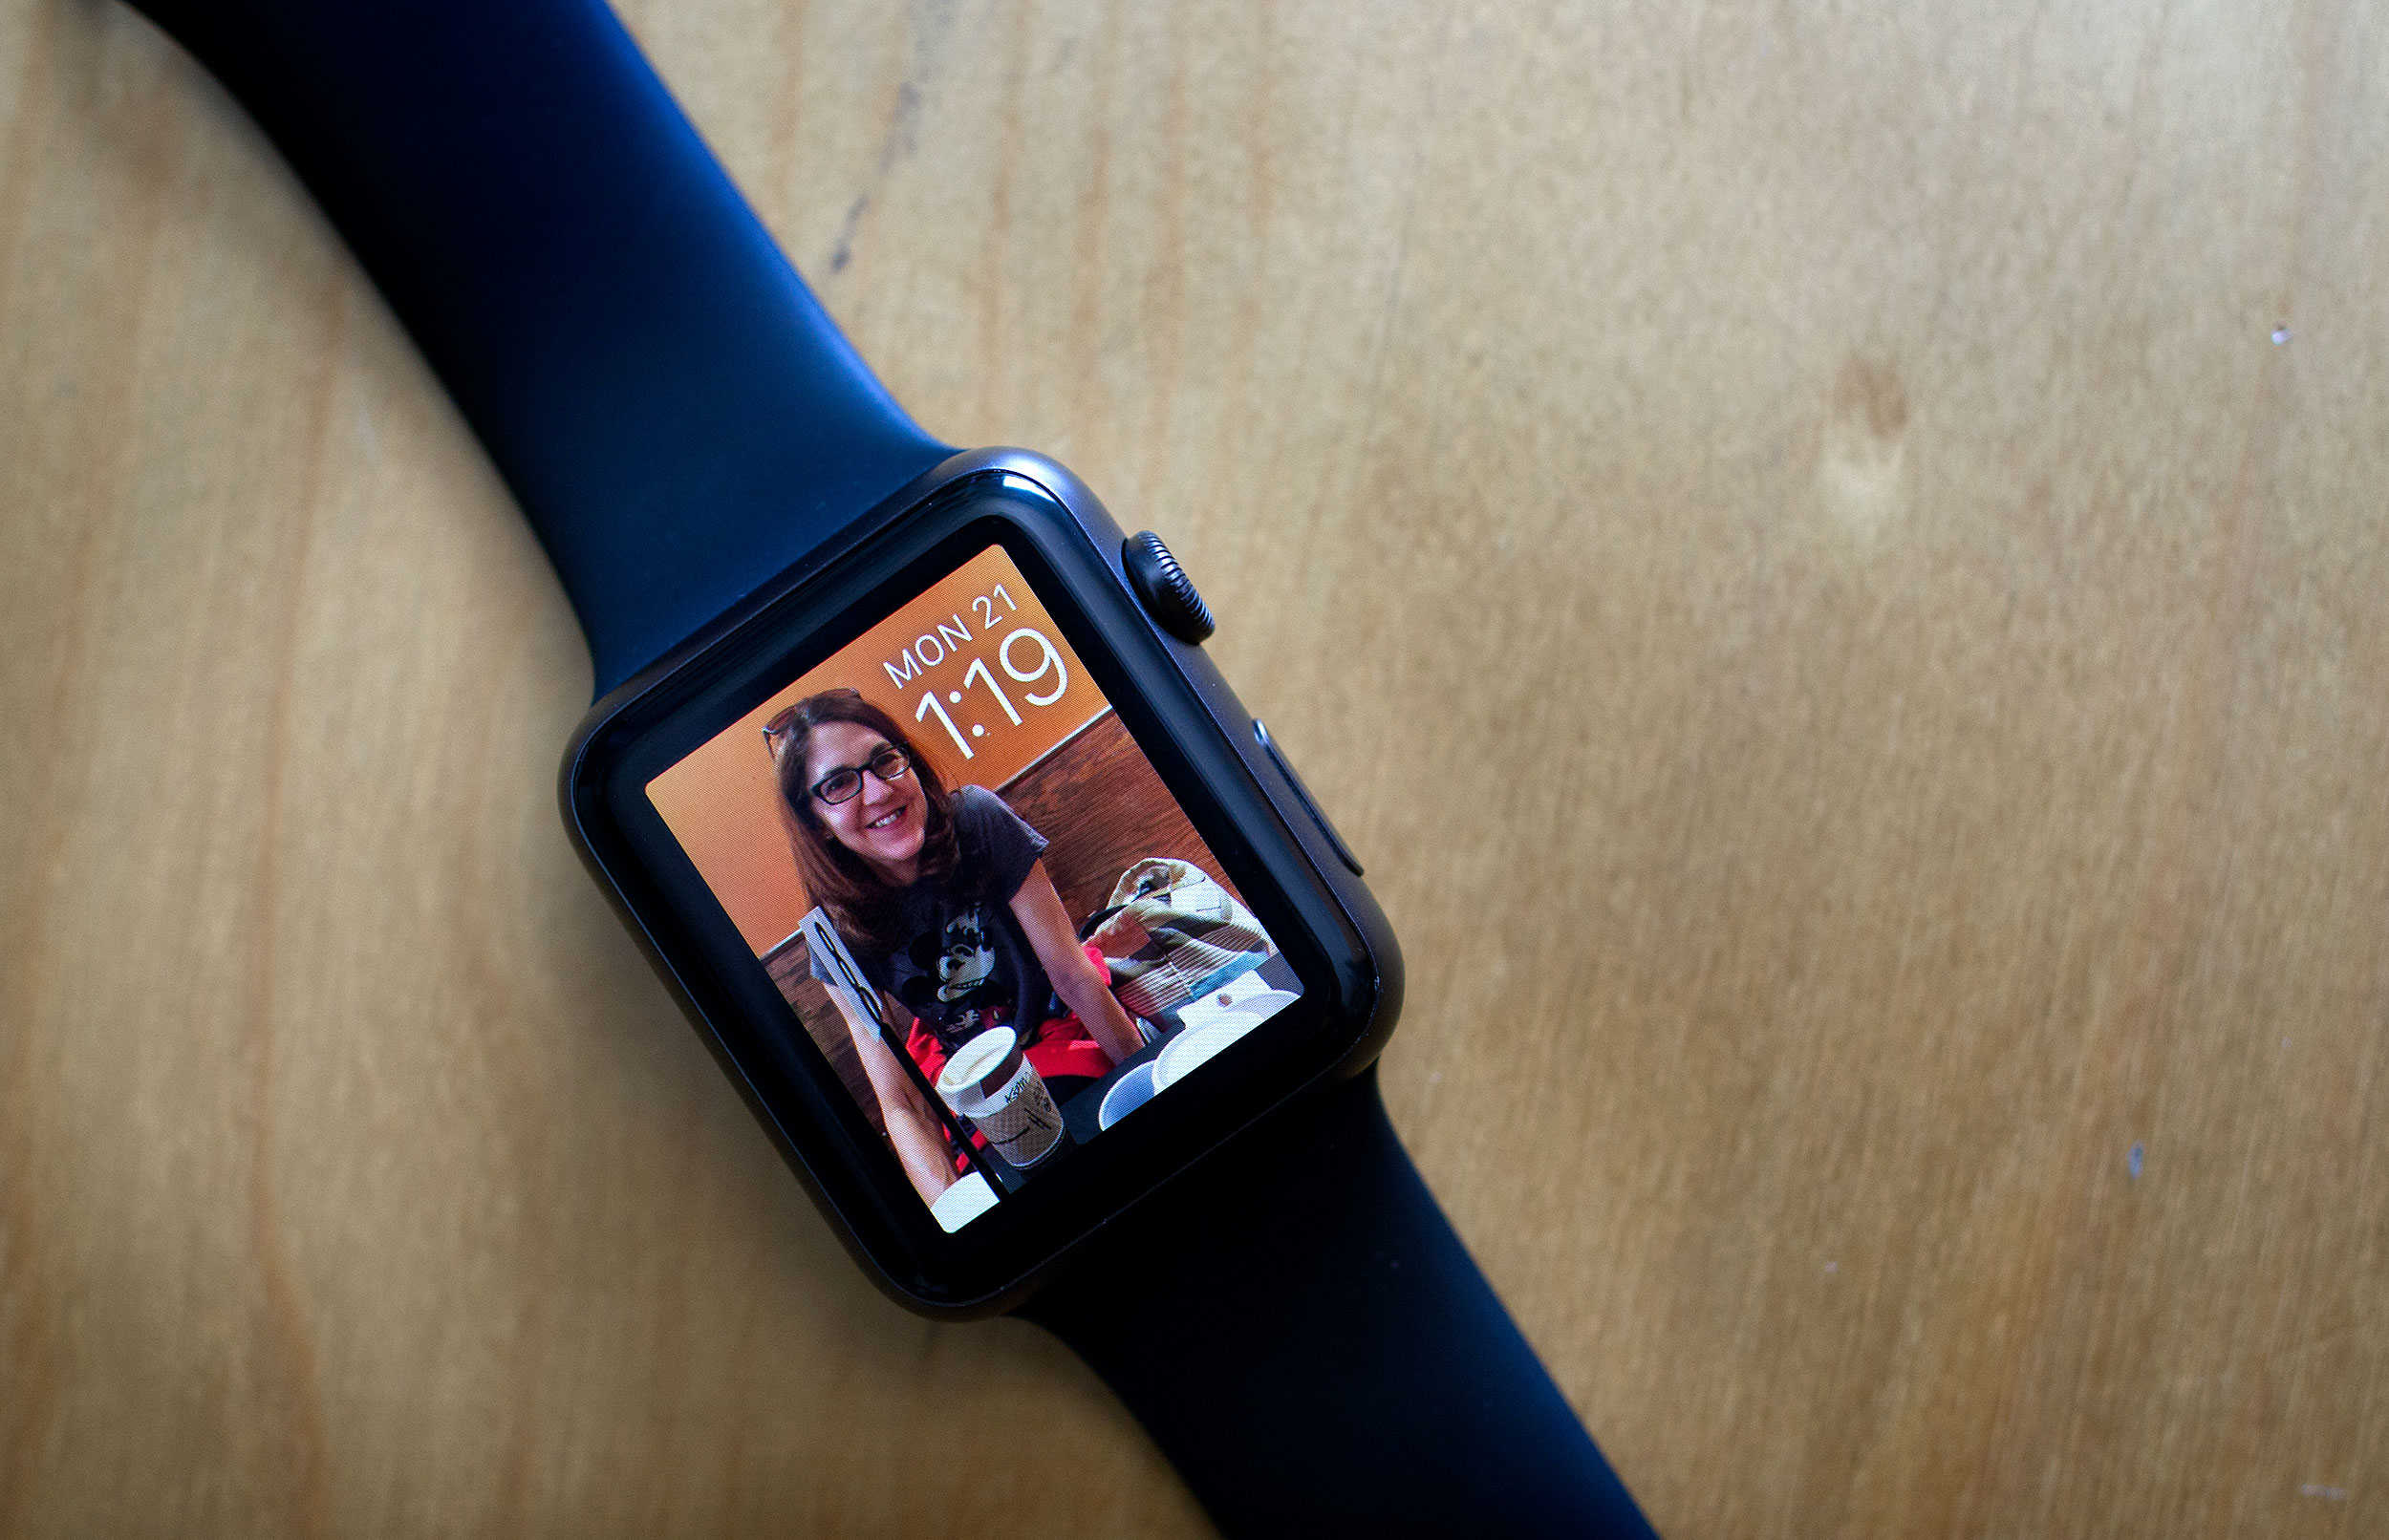
Force Touch on the picture and select “Create Watch Face” like before, and you’re all set. You can see my updated version on the right, and I think it looks way better this way. Sorry, tiny coffee mug and my leg. You didn’t make the cut.
Your pictures may look a little fuzzy on your iPhone (and in this post), but they’ll look just fine on your smaller Apple Watch screen.
If you want to use a Landscape photo for your custom Apple Watch face, you just have one additional step. Here’s what the whole process looks like, with another photo of my friend Mr. Sullivan.

Photo: Evan Killham
If your iPhone is looking at a landscape picture, it won’t give you the 4:5 aspect ratio, but will instead offer the 5:4 for wide photos. So before you do that step, you have to crop your picture to make it a taller, portrait-style pic. You don’t have to save between this and picking the ratio; once you have a tall image in there, the correct options will appear.
 After that, it’s the same process: Drag and zoom to get it to your liking, and then save and switch to your Apple Watch to complete things. You can check out my (again, slightly fuzzy) before and after pictures on the right; the one on the left is what the Apple Watch guessed at, and the one on the right is my tweaked version.
It sounds like a lot of steps, but it doesn’t take long at all. Soon, you’ll be making perfect custom Apple Watch faces exactly the way you like them.


Leave a comment