How Apple Watch pace alerts will make you run faster
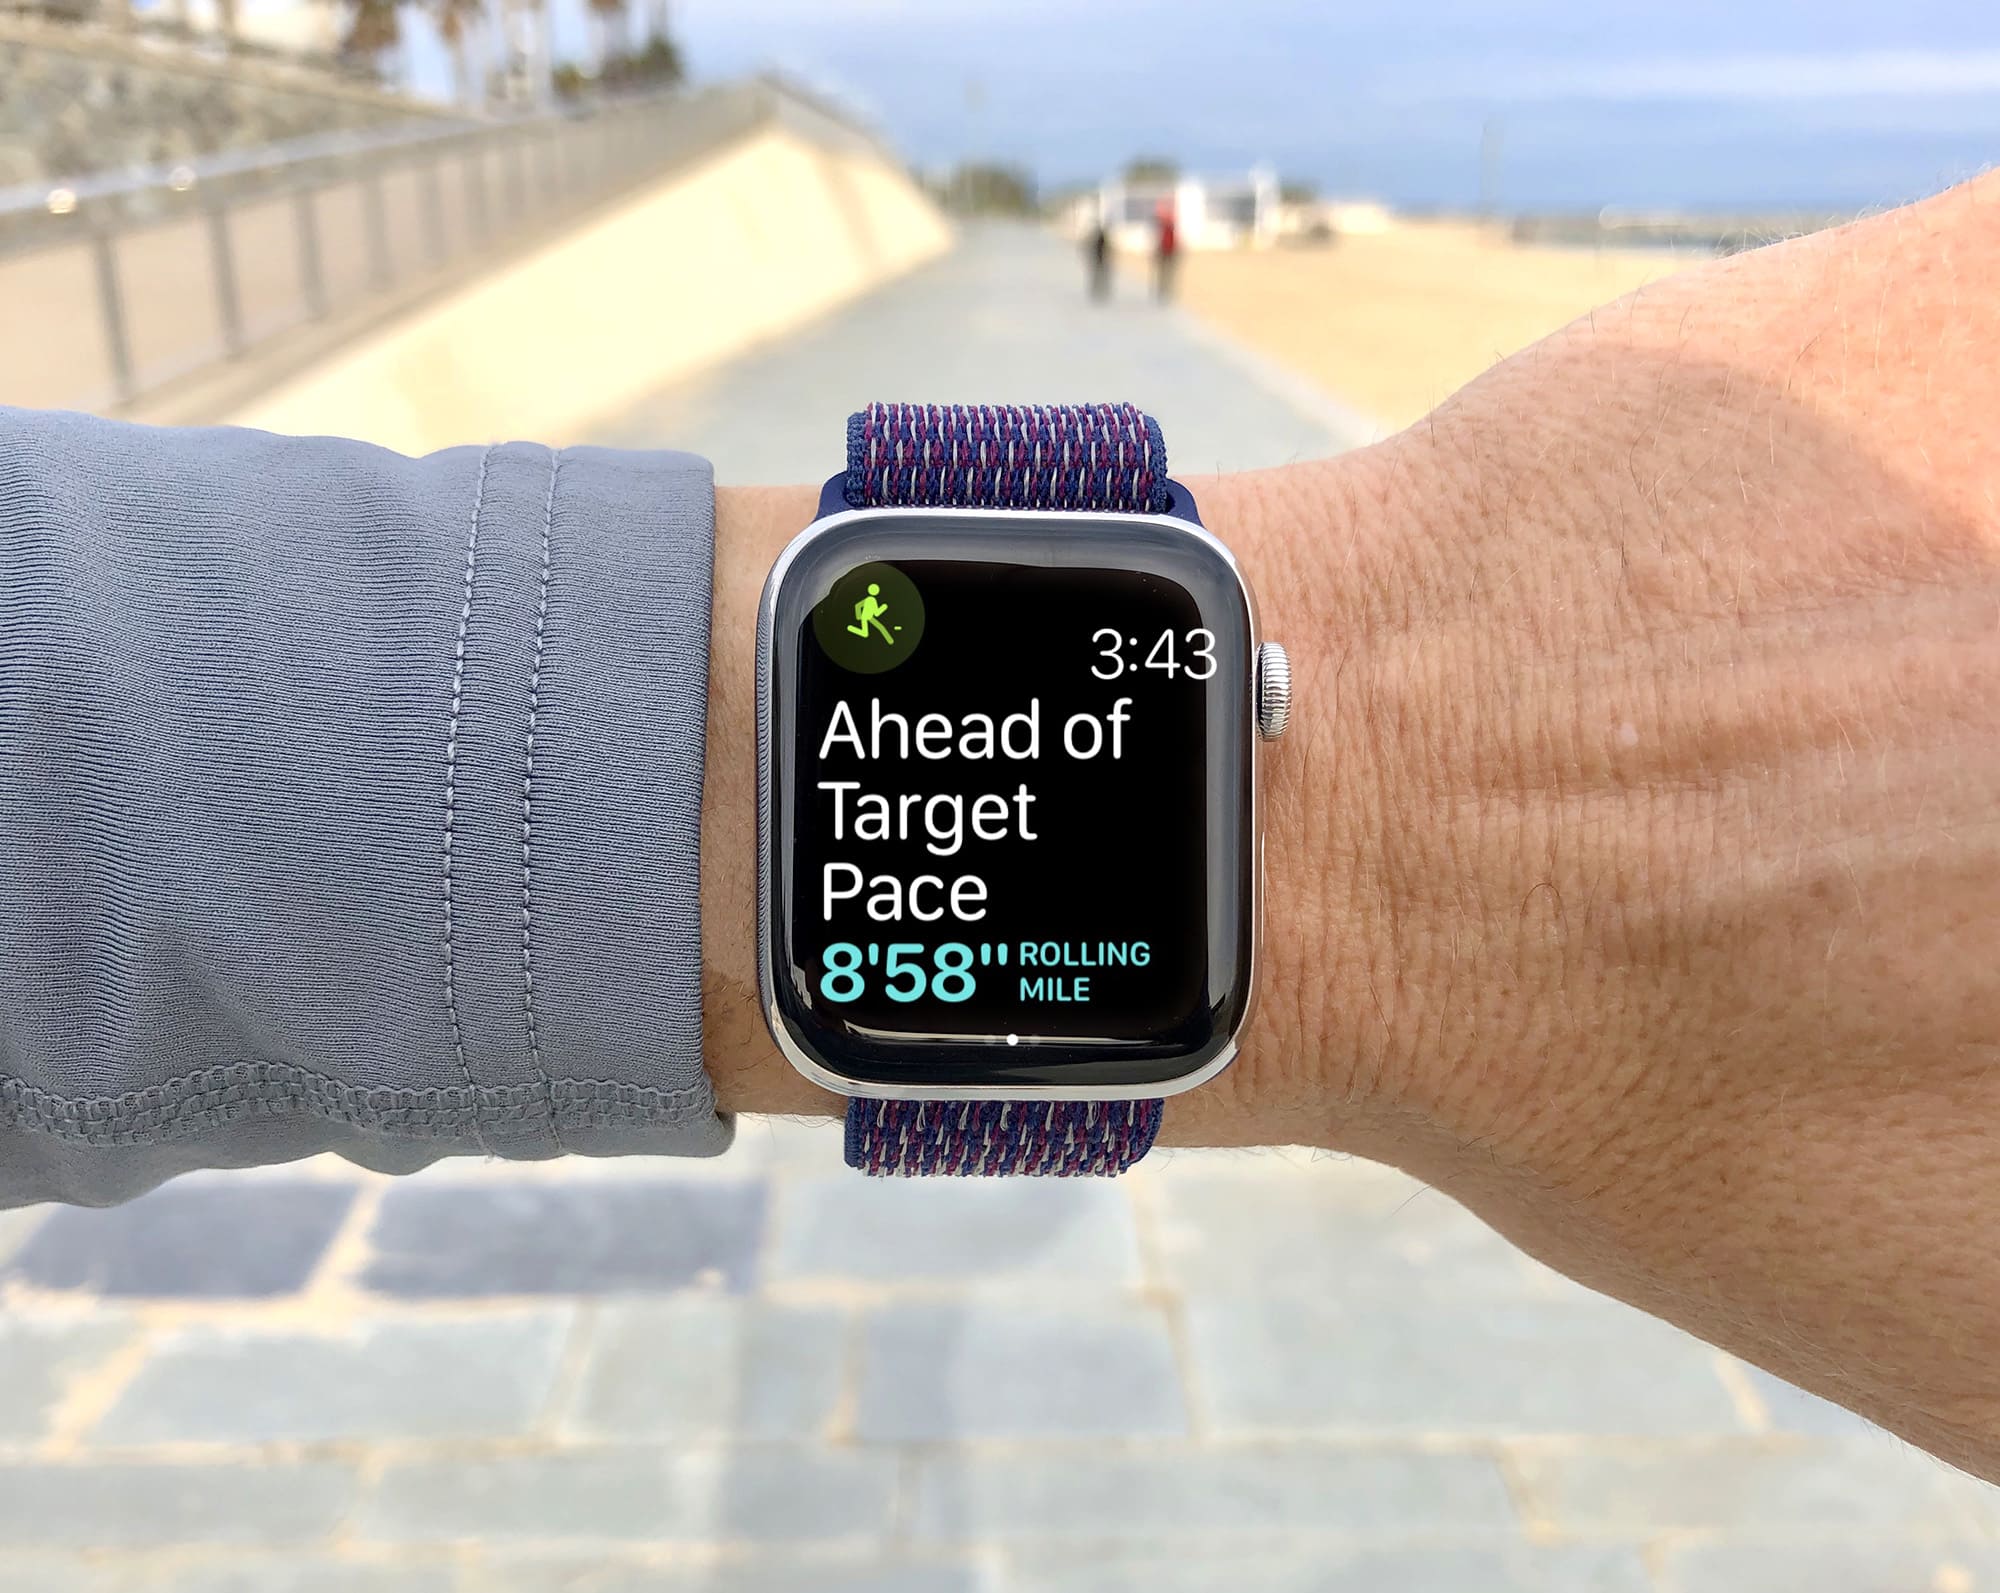
Apple made three big strides for runners in watchOS 5, adding Pace Alert, Rolling Mile pace and Cadence features.
In this post, I’ll focus on Pace Alerts, which let you set a specific pace for your run. This handy new feature is not just designed to keep you moving by warning you if you slow down. Pace alerts are ideal for lactic threshold workouts, which will help make you a faster runner. And you can use them to develop your pace awareness — an essential skill if you want to achieve a personal best this marathon season. Here’s how to get up to speed with pace alerts on Apple Watch.
Speed versus pace: What’s the difference?
Apple Watch always provided pace as a metric in running workouts.
Pace is used by runners because it measures your speed over a certain distance. So, instead of distance/time (miles per hour), it’s based on time/distance (minutes per mile)*. Converting between speed and pace involves a bit of mental arithmetic, but fortunately Siri can help. Just raise your wrist and ask, “What’s 7.5 miles per hour in minutes per mile?”
As Siri will tell you, if you are running at 7.5 mph, that’s a pace of 8’00”mi, meaning that it would take you eight minutes to run one mile.
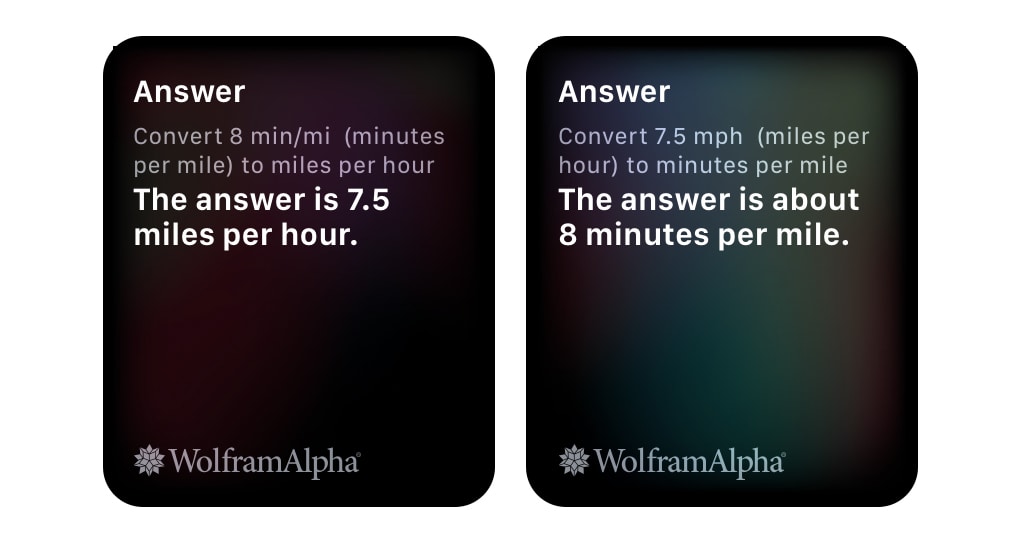
Photo: Graham Bower/Cult of Mac
This is handy for runners, because it makes it easy to estimate how long it will take to run a race. For example, a marathon is around 26 miles. So at a pace of 8’00”mi, that would take 208 minutes (8×26=208) to complete (i.e., 3 hours and 28 minutes).
What’s new with the Pace Alert feature in watchOS 5 is that now you can receive notifications during your workout. If you start running faster or slower than your target pace, your watch can alert you with a double-tap haptic on your wrist.
This new feature helps you make sure you are running at a consistent pace throughout your workout. But why is that so important?
Learning to pace yourself
If you’re new to distance running, it’s tempting to start running as fast as you can on race day. But this is a rookie mistake. The problem is that if you begin the race too fast, you’ll exhaust yourself prematurely, and end up walking (or staggering) through the second half.
Why do so many runners make this mistake? Because at the start of the race you feel fresh, and you’re surrounded by other runners, so your competitive instincts kick in. You throw your race plan out the window, burst off the start line and go as fast as your legs will carry you. I know. I’ve screwed up many races this way myself.
Completing the first half of a race at a faster pace than the second half in this way is known as a “positive split.”
If you want to achieve a personal best, it’s usually best to aim for an even pace throughout the race. Some experts even recommend doing a “negative split” (running the second half of the race faster than the first), although there is some debate about this.
Maintaining a consistent pace requires pace awareness: the intuitive ability to sense that you are running at the correct pace. And that’s where Apple Watch pace alerts come in handy.
How to set up pace alerts in watchOS 5
In the Workout app in watchOS 5, scroll to the Outdoor Run workout (if it isn’t already at the top of your list!) and tap on the … icon at top-right. Beneath the four big buttons, you’ll see the tip of the Rolling Pace Alert button. Scroll down to it, and tap it.
Now, the watch presents you with a few options. At the top of the screen, you will see a button that says Set Pace if you haven’t used it before. (If you previously used it, the watch will show the pace you used last time.) Tap on this and use the Digital Crown to select your target pace. If you’re not sure what pace to choose, see below for my handy suggestions.
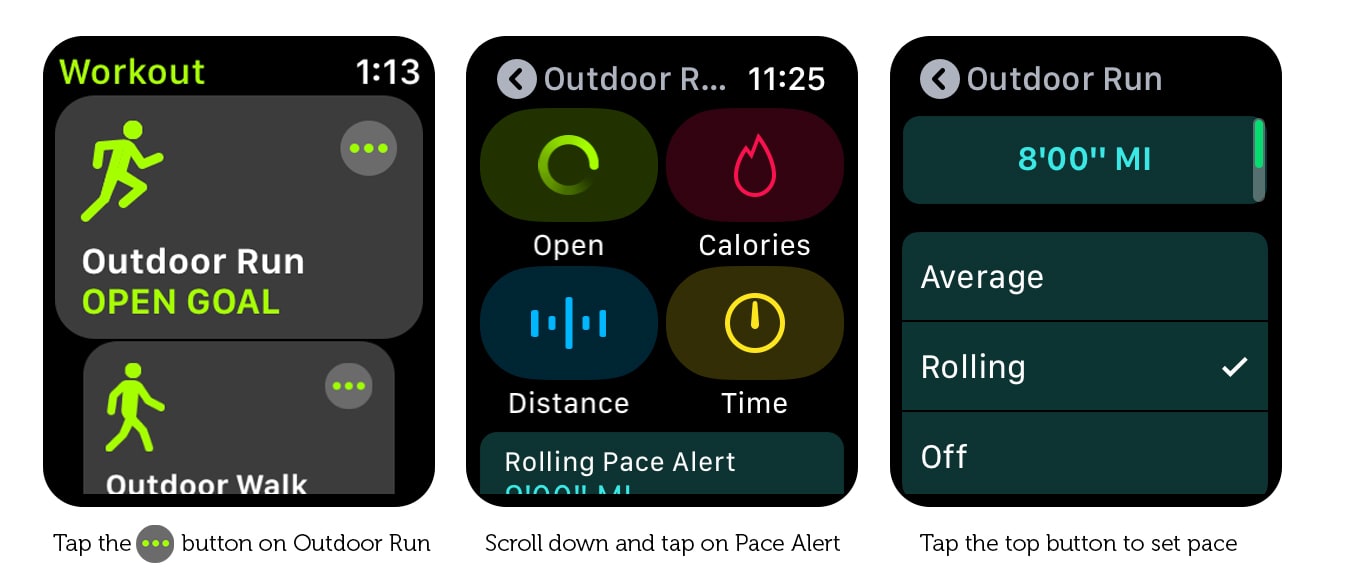
Photo: Graham Bower/Cult of Mac
Should you choose Average or Rolling Pace?
Once you select your target pace, you need to choose between Average and Rolling pace. Apple says, “Average is your average pace for all the miles you’ve run. Rolling is your one mile pace taken at that moment.” But what does that mean in practice?
If, like me, you have a tendency to run positive splits, where you start way ahead of your target pace and then progressively slow down, you may never trigger an Average pace alert, because your fast first half skews the stats. So Rolling pace alerts would be a better choice.
Conversely, if you tend to run negative splits, where you start out too slow and speed up, then Average pace alerts could be for you, because they will soon tell you to get a move on. Another benefit of Average pace alerts is that because they’re based on a larger data set (your entire workout, rather than just the last mile), they may be more accurate.
Running with Apple Watch pace alerts
One you’ve chosen your target pace and selected between Average and Rolling, tap the back arrow (top-left) to return to the previous screen. Now, pick a workout type in the usual way. (If in doubt, select Open.)
Initially, you won’t notice any difference from a regular workout, because Apple Watch does not give any pace alerts for the first mile*. After the first mile, you’ll get a dreaded double-tap on your wrist to tell you off for deviating from your target pace. It really should be a slap on the wrist, but I guess that’s asking a bit much from a watch. The on-screen display tells you if you’re ahead of target pace (too fast) or behind (too slow).
When you get a pace alert, take a moment to notice how you’re feeling. How fast are you breathing? Could you talk right now, or are you panting too much? How do your legs feel? And how fast is the scenery passing by? Look for all these clues to learn how it feels to be running at different paces. That will help you instinctively judge your pace without needing to rely on your Apple Watch. That skill will pay off massively on race day.
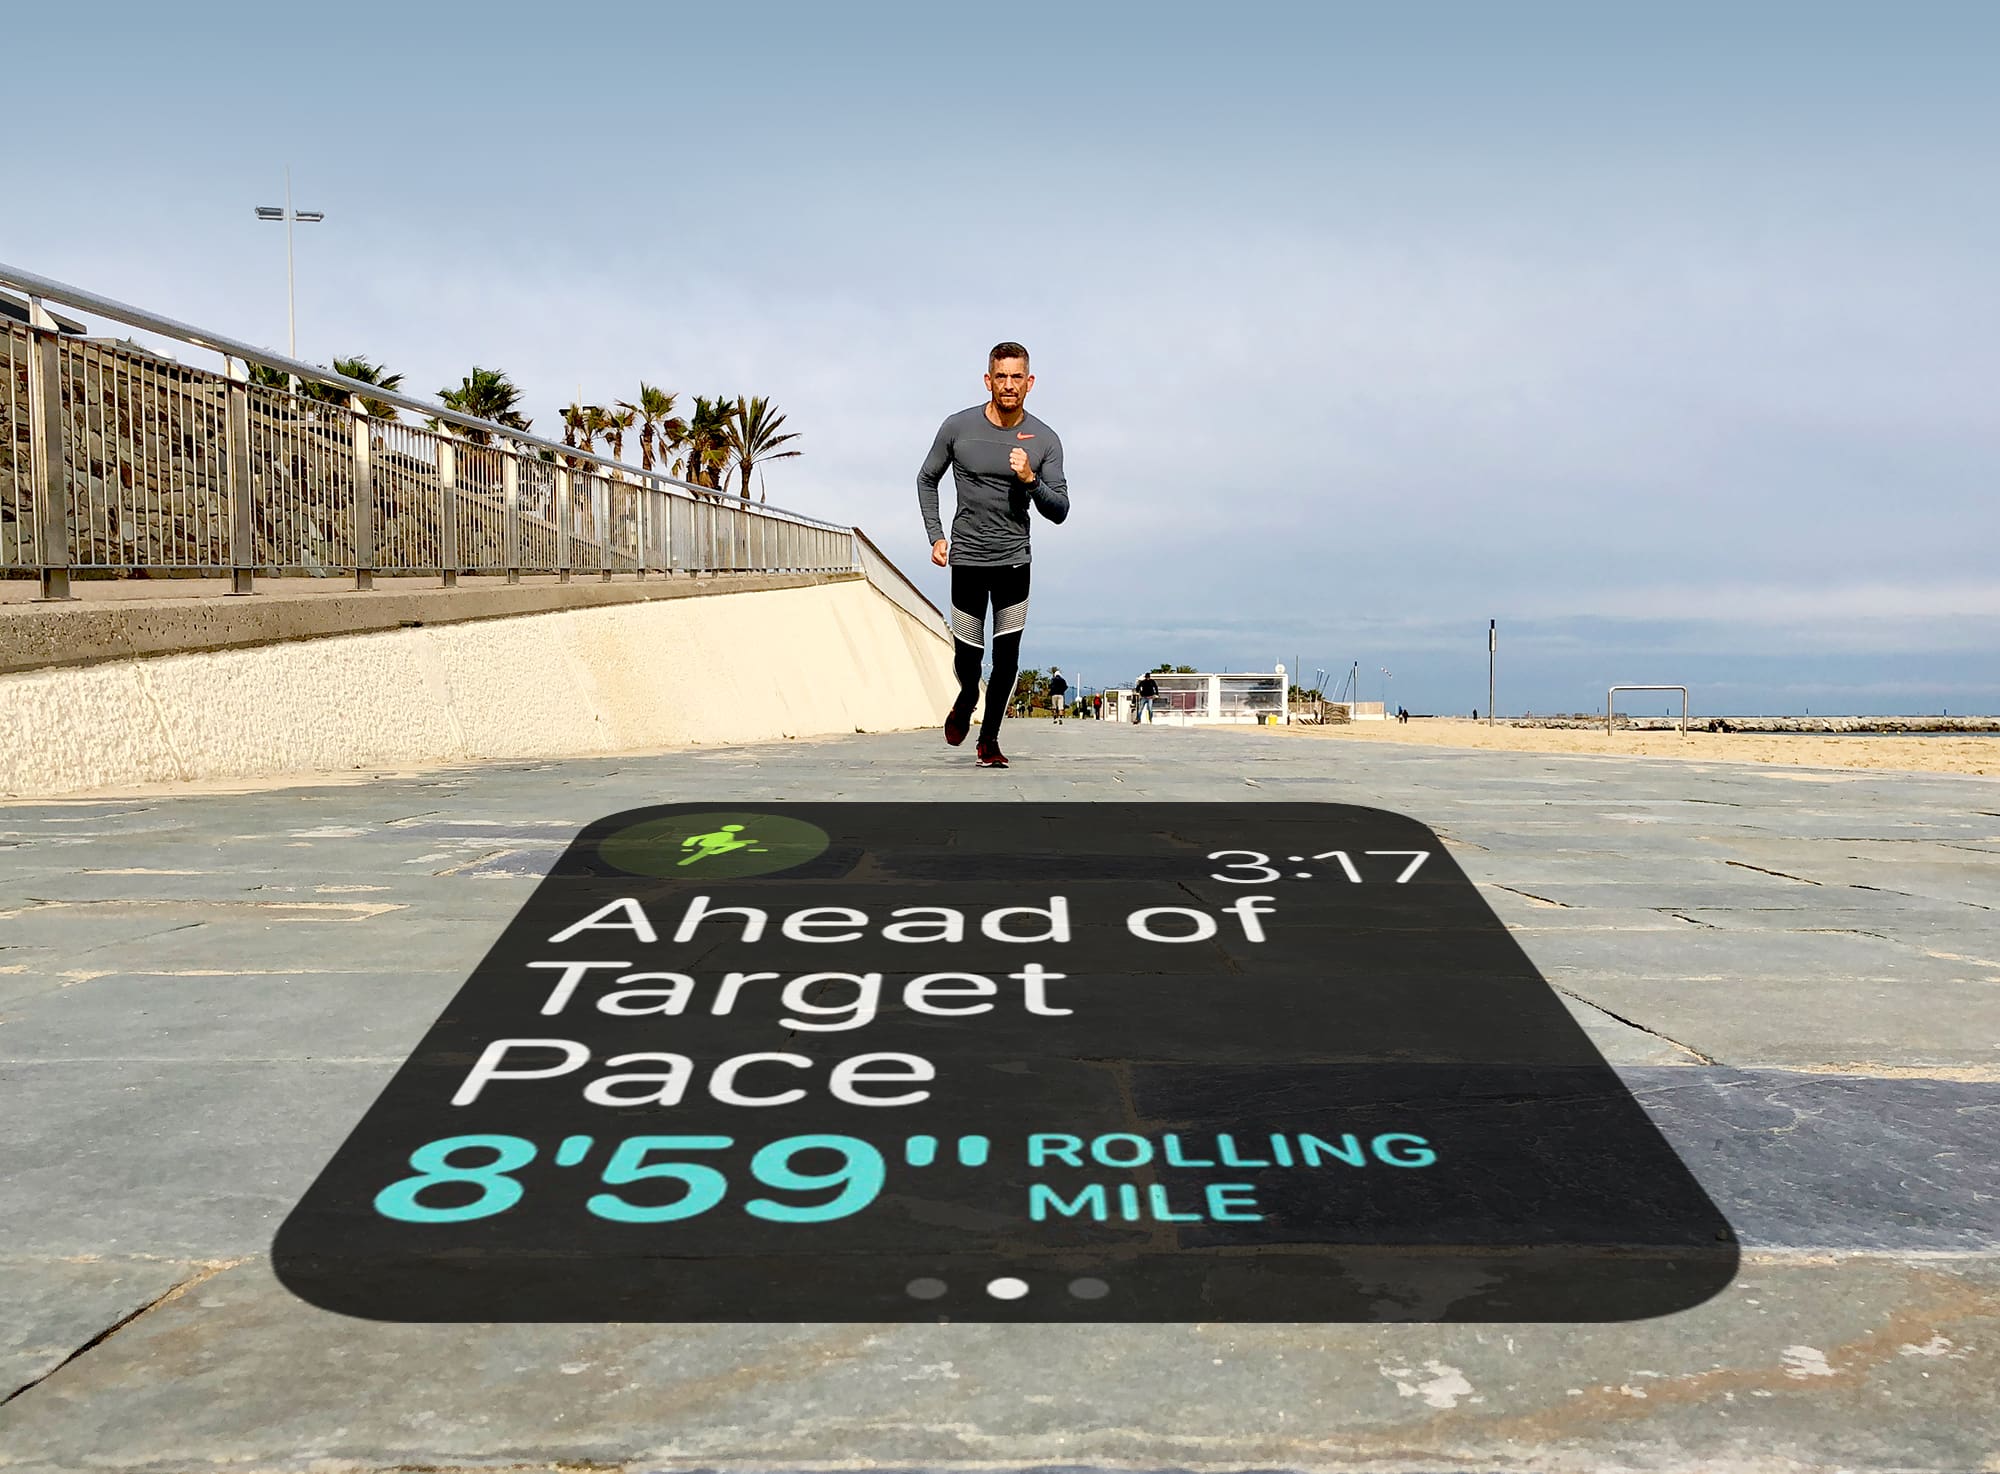
Photo: Graham Bower/Cult of Mac
How to choose your target pace when running
There is no right or wrong target pace. It depends entirely on your running ability and your objectives. You should also consider your health. Running at a target pace is a very intense form of workout. If in doubt, check with your doctor first, and always use your best judgment when selecting a pace that is safe for you.
Whatever pace you choose, make sure that it is realistic for you. From my experience, if I don’t run the first mile close to my target pace, I don’t get any pace alerts from my Apple Watch for the entire workout. Which is perhaps just as well, because if you set the target pace too fast, it would be pretty demotivating to get endless alerts about it.
With all that in mind, here are my three top tips for setting a smarter target pace:
– 1. Monthly average pace
– 2. Race pace
– 3. Tempo pace
1. Monthly average pace
This is the simplest option. It’s the pace you normally run at, so you get notifications if you start running faster (yay!) or slower (boo!) then usual.
To find your monthly average pace, open the Activity app on your iPhone and tap on the Workouts tab. Then tap on the back arrow at top-left to see a summary of the year’s activity by month. Now tap on All Workouts at top-right and select Running. You should now see your average pace for each month, highlighted in light blue.
In the example below, you can see my average pace in May was 8’53” per mile. I can simply enter that as my target pace.
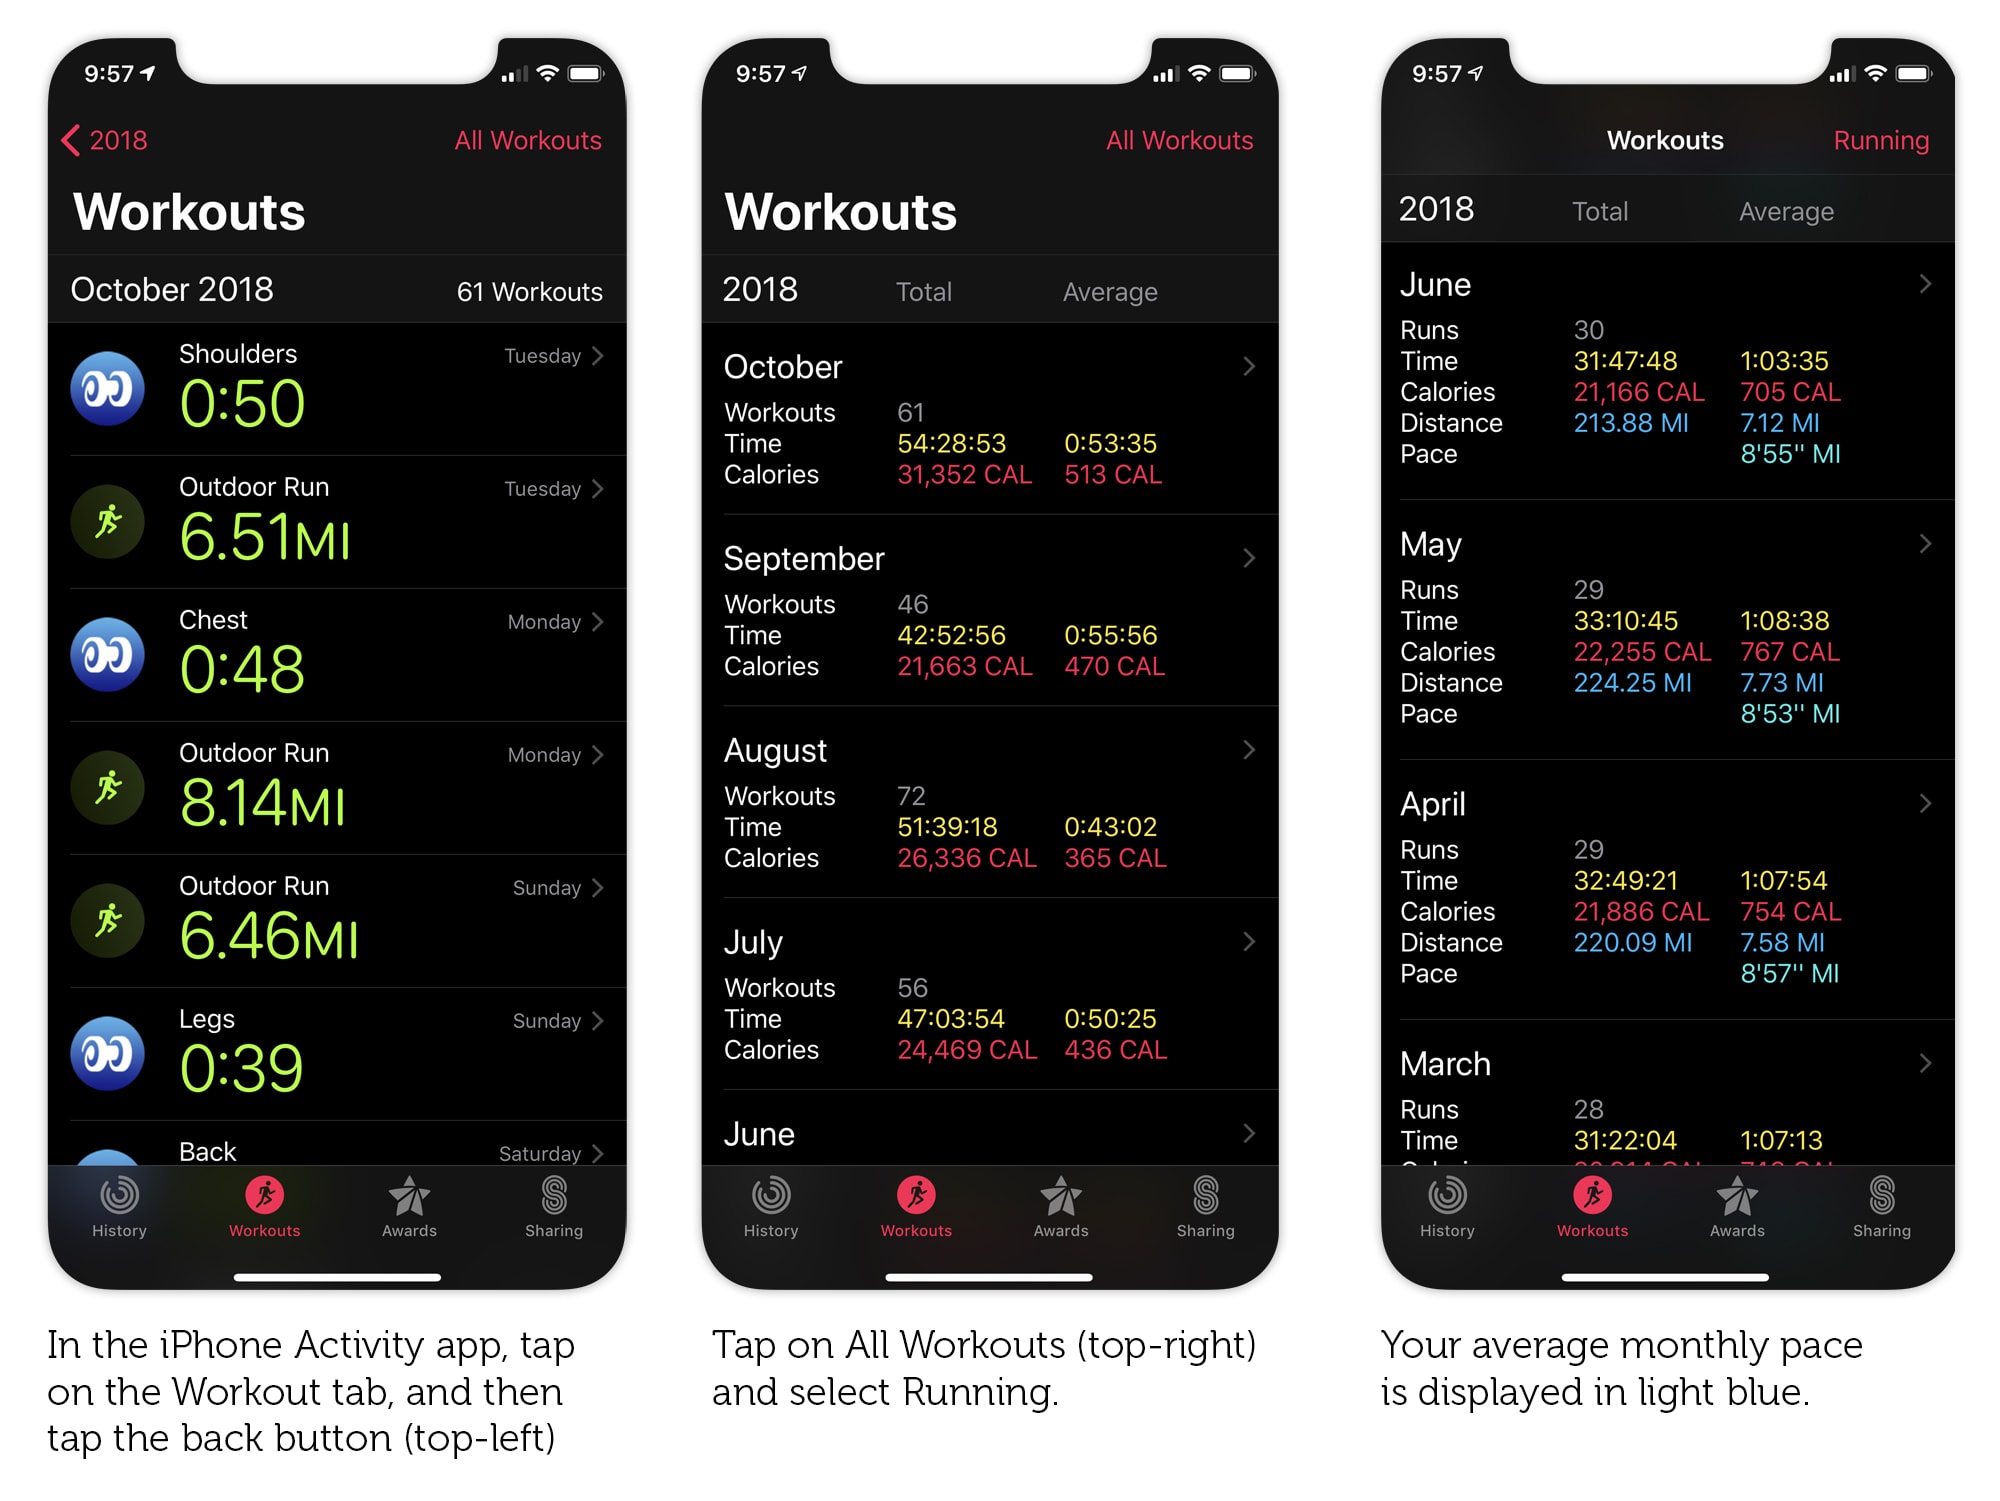
Photo: Graham Bower/Cult of Mac
2. Race pace
If you’re training for a particular running event, like a 10k, a half marathon or a full marathon, you might already have a target time in mind. For example, my personal best for the marathon is 3:19. My worst is 3:45, and I’m hoping to do my next one somewhere in between, say 3:35.
A marathon is 26.2 miles long, and 3:35 is a total of 215 minutes. So I just need to divide 215 by 26.2 to get my “race pace,” which is 8.2 minutes per mile (8’12” per mile).
Siri can’t help with this calculation. But fortunately, you can look up your race time on these handy pace tables from Runner’s World.
When you’ve worked out your race pace, you can enter this as the target pace. Doing a workout at race pace is pretty strenuous, so only do it for short distances initially. It’s best to build up the distance you run at race pace gradually. For example, by doing one race pace workout a week, and adding half a mile to the distance each week.
If you find your race pace is too strenuous, you should review your target time and allow yourself more time to complete the race.
Training at race pace is important because it gets you used to how it’s going to feel on race day. But if you do too much of it, there’s a risk you’ll burn yourself out or get injured. That’s why it’s a good idea to also include tempo workouts in your training program.
3. Tempo pace
Your tempo pace is the fastest you can comfortably and consistently maintain for 20 minutes of training. It should be slower than your race pace, but faster than your monthly average pace. You should push yourself pretty hard during a tempo workout, running hard enough that you feel almost out of breath.
When you work your muscles hard, they generate lactic acid, which is removed via your circulation. This acid makes your limbs ache when you train. As you work harder, the lactate level in your blood increases until eventually your system struggles to remove it all fast enough. Running at tempo pace is known as lactate threshold training because it takes you to the limit of the amount of lactate your system can clear.
It’s a good idea to check your Apple Watch’s heart rate monitor during tempo runs, because this will give you a good idea of the intensity of your workout. It should be higher than during a monthly average pace run, but lower than your maximum heart rate.
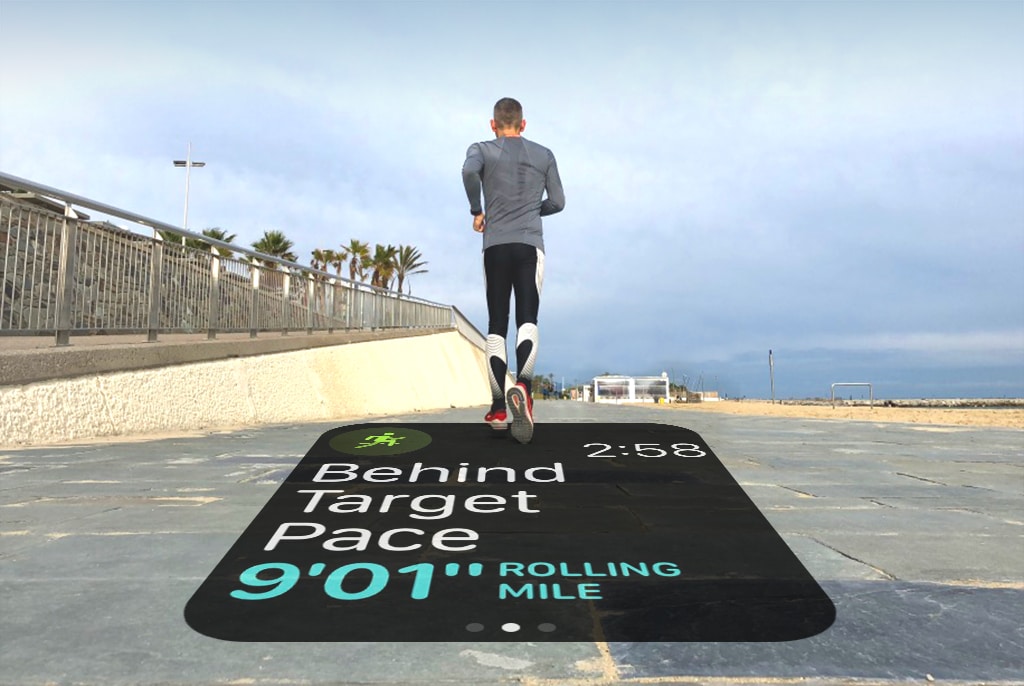
Photo: Graham Bower/Cult of Mac
Warm up and cool down
Running at a consistent pace is all very well, but when you are doing intense training like a tempo or race pace workout, it’s really important to remember to warm up before you get started and cool down at the end.
The trouble is, if you log the warmup and cool-down segments as part of the overall workout, this will mess up your pace times.
Fortunately, Apple Watch provides a solution for this. You can log multiple workout types without ending your session.
Start an Outdoor Run workout with the target pace for your warmup (something nice and slow), then swipe right, tap the + icon, and then tap the … icon next to Outdoor Run. Change the target pace (e.g. to your tempo or race pace). Finally, when you are ready to cool down, swipe right again, tap the + icon again, and pick a third Outdoor Run, this time with a nice slow pace.
It’s like a running coach on your wrist
I’ve been using pace alerts on my daily run for a few weeks now, and I love them. It’s a very welcome addition to Apple’s already excellent Workout app.
Getting regular feedback on my pace is like having a running coach with me wherever I go. It has already had a massive impact on my running by raising my pace awareness. As a result, my average pace has gotten much faster.
So if you haven’t already given Apple Watch pace alerts a try, hurry up and go for a run.
* If you have the Workout app set to kilometers rather than miles, pace will be measured in minutes per kilometer, (handy if you’re training for a 10k); Rolling mile pace will become Rolling Kilometer pace; and you won’t get any alerts for the first kilometer instead of the first mile. To switch between miles and kilometers, in the Workout app, tap on the … icon on Outdoor Run, then tap on Distance and force-tap.



Leave a comment